Monday 25 August 2014

A Little Update For You All!

Some of you may have noticed that it has been pretty quiet on the posting front lately so I wanted to update you with what's going on behind the computer screen!

The first thing is that I am phasing out this blog and starting up a new one which I have been working on over the summer. Turns out, it's one of those things that can sit nicely on the long finger for quite a while! I've been meaning to start it up since this time last year, however I've finally decided to take the bull by the horns and 'launch' it, while working on the final touch ups as I go. (Believe me, the perfectionist in me is not entirely happy with this but at the same time, the start of the year is as good a time as any to start afresh!)
The reason behind starting this new blog is that I am no longer teaching in an infant class and while I had a good amount of material and ideas to keep me going for the past year, I'm starting to miss the excitement of sharing what's actually going on RIGHT NOW in my classroom.


This new blog http://primaryschoollessons.blogspot.ie is going to be somewhere for me to write about projects and lessons I have undertaken with a variety of different class levels over the years and also general classroom management/topical posts similar to that which you have seen me write about in this blog. The style of posting will be the same as 'Senior Infant Adventures' and I will be hoping to put up lots more thematic units because I know people have found that format of post very useful in the past! Also, to all those who have recently followed me on Facebook/Twitter and are starting with Senior Infants this year, don't worry, all older posts will be put up over time on this new blog. I still have a few great lesson ideas to share in the future also in relation to infants, so keep an eye on that too!

That brings me to another project I will be undertaking over the next few months. I'm involved in implementing the Aistear Curriculum in a preschool setting at the moment and I'm hoping to share some ideas/plans/resources/experiences that we come up with along the way over the next while, on my new blog. I think this is really topical at the moment for infant teachers and I'd love to know if many of you out there would find it useful!

Overall, exciting times ahead and please, please, PLEASE check out my new blog so you don't miss out on any new posts! You can follow it on Facebook here (apologies for the lack of content so far!) or keep an eye out for the Twitter page that will appearing soon!
Thanks everyone!

Tuesday 20 May 2014

Religion in Senior Infants

Due to the fact that I had my Diocesan Adviser/religious inspector last week, I was inspired to post a few religion resources that I have built up and a few ideas for what to revise with the children prior to a visit. Hopefully, this will  be useful to those of you in your first year of teaching who don't know what to expect from the visit!

Resources
1. I often create PowerPoints of the various Alive-O stories in an effort to make them more interesting and more memorable to the children. Along with doing this, it is a good idea to use some of the children's names as characters in the story or even set it in their environment/town etc. 
Here are some of the PowerPoints I have created. Keep in mind that you can write the text of the story if you like in each slide but my aim was to keep it simple and just choose a few key pictures to flick through as I read the story.

2. I have downloaded some very good PowerPoints to tell the children about the story of St. Patrick and St. Brigid. 

From Seomra Ranga:


3. I used these actions when I taught the children the Our Father. I got them off www.worship.ca but I can't seem to find them now so I will just repost them below. Click on the link beneath the picture to see and download the document in full. 

How should I prepare for the Diocesan adviser? 
1. Make sure you have taught all prayers for the class level. Along with the prayers taught in Junior Infants, they should know the Our Father and Hail Mary.

2. Make sure you have read them all the bible stories in Alive-O. They might be asked to tell these stories in their own words. You can find a brilliant list of Senior Infant stories, songs and prayers here: http://education.dublindiocese.ie/2012/02/21/senior-infants-alive-o-programme/ 


3. Make sure they know about Jesus' Resurrection and birth. 


4. Make sure copies/workbooks are corrected and they can pick a favourite page and talk about it.   

5. Practice a song from the programme by heart (preferably one that also taught them something!).


6. Make sure you have a Sacred Space in your classroom. On mine I have: a candle, pictures of Jesus, Mary, etc., prayers, rosary beads, flowers (May), a cross/St. Brigid's Day cross, a children's picture bible, holy water (there is a lessons about this in senior infants) and some children's work (the new religion curriculum will apparently involve the children decorating/creating the sacred space themselves).


7. I picked out some questions I think they should be able to answer below also:

  • Why is Christmas a really important time of the year for us/ Why do we celebrate Christmas?
  • Where was Jesus born?
  • Who came to visit Jesus when he was born?
  • How did the three kings find Jesus?
  • What gifts did they bring? etc.
  • How did Mary find out that she was going to have baby Jesus?
  • Before Jesus was born, Mary went on a journey to visit her friend. Do you remember her name?
  • Who was St. Patrick?
  • What did he use the shamrock for?
  • Why did he become a priest?
  • Who was St. Brigid? What did she use to teach people about God?
  • What did she do with her cloak?
  • Why do we have Lent?
  • What happened to Jesus at Easter? etc.
  • What is peace?
  • Where do you find peace?
  • Who were Samuel and David? 
  • Why was Samuel not happy? 
  • Who did God want to be the leader of his people? Was it the strong older son?
  • What job did David do? Why would a shepherd be a good leader? What makes a good leader?     
  • Tell me about Moses.                                                

I hope you find this useful!

Tuesday 28 January 2014

Valentine's Day Themed Lessons

Children love having 'themed' days in school and Valentine's Day offers a brilliant opportunity to link a wide range of subjects under one big theme. Here are some ideas that I have tried out in the past!

English: Creative Writing/Reading
I made out a big card for the class with the word 'love' on the front in a heart. I left it out on the morning of Valentine's Day and told the children that it had arrived in the post for them. First of all, we predicted what might be inside the card. We then opened it up and played a game of I Spy. We spied words with capital letters, words starting with ___, the word love, etc . We then read the card together. Following this, I covered the words on the card with blank sheets of paper. We had to match some words written on flashcards to the card, where they were missing/covered. We wrote a new card as if we were writing it to Mammy and Daddy, as a class (LEA). They children then created their own cards using our class card as an example (To ___, I love you. Love Mary.) 

English: Sight Word: Love
We learned this song during the week leading up to Valentine's day:
                        
We also used the word in our writing and read stories with the word in it.

Maths: Counting to 20 and Estimation
I gave the children out little bags of sweets and they had to estimate how many sweets were in the bag. We then counted them all together emphasising moving them to one side as they were counted. When we counted 20 sweets, I asked them to eat one and tell me how many they think they have left and then to check this number. I then got them to make me little groups of sweets: 3, 5, 10, 15, etc.

I handed out a template containing various heart shapes (see below). We looked at each heart on the IWB and talked about how many sweets they thought would fit into each heart size. We noted them beside the hearts on the IWB. They had to test how many sweets would fit into each heart after this and they wrote the number underneath the heart. We compared answers with estimates.

Art: Jim Dine Hearts:
I chose this activity as the children could complete it in a short time without much help, perfect for a mini theme based art lesson! We looked at some examples of Jim Dine's heart art and talked about the colours he used. We discussed words to describe the marks he used and the shapes of the colour blocks. They drew a big heart on a piece of paper. They coloured inside the heart with warm colours (using similar shapes) and outside the heart with cool colours. They then painted the pictures with a little olive oil to create a stained glass effect. I blotted them before leaving them to dry. When they had dried I added paper borders (using mounting paper that I had measured and cut into a border with a blade). I rolled them up and tied them with a ribbon. I attached a little heart shaped pink notelet to the ribbon on which they wrote a message (to their Mum or Dad).

Religion/History: The Story of St. Valentine
We looked at this video and talked about it afterwards. They each recreated a scene from the story on a piece of paper. I selected some pictures to display along with sentences about the story, on the wall.

Happy Valentine's Day!

Monday 13 January 2014

Sight word games!

I have had a request to share some ideas on how to teach Sunny Street sight words to Senior Infants and as a result, here is a little compilation of ones I like best. I have collected some of these ideas from various places over the years and come up with some myself, so apologies if I can't give credit to whoever came up with the activities originally! There are a mixture of activities here suitable for whole class teaching, literacy center activities, group activities and pair activities.

1. Tic Tac Toe: 
Go through sight words with the class to begin with. Then, with words on a word wall in the classroom and using a pointer/feather to point to each word, chant the rhyme: 'Tic, tac, toe, here we go, where we stop, no one knows' (point to a different word for each word of the rhyme). When you land on the final word, the class call out the word they have landed on. I like to use quiet voices, loud voices, fast, slow, deep and high voices to say the rhyme to keep it interesting. You can also ask individual children to name the word after a couple of rounds as a group. Ask children to be the teacher for another variation on the game.

2. Bingo:
Make out bingo cards for the class, (having about 6 different versions so they do not all have the same card). Pull the words out of a bag and get them to place counters on the correct words to make three in a row. 

3. Hide and Go Seek:
Hide a few words in different places in the room. Get the children to find and point to the word ___. 

4. Beat the Clock Flashcard Game: 
Get them to see how many words they can name in a minute.

5. Sight Word Songs:
Heidi's Songs on Youtube has some great songs with actions to teach sight words. Great transitional activities too. 

6. Stepping Stones:
Get the children in groups to play a leap frog kind of game where they have to be able to read the word before they can jump onto the flashcard.

7. Toss the Coin:
Using the same cards you used for bingo, get them to toss a counter and when it lands on a word, they must read it. Take in turns. 

8. Pick a Card:
Get them to play pick a card using small 3 inch long word cards, with a partner or with you on a one to one level when you are hearing their reading. See who can win the most cards. If they cannot read a word, it goes back into the bunch and they can try again later. 

9. Roll the Dice:
In pairs/with teacher, have all of the flashcards upside down, roll a die and count that many cards before you turn the one you land on over and read it. If you can read it, you can keep the card. If not, place it back where it was and play again.

10. Writing Words: 
Get children to practice writing words on sand, on whiteboards, on blackboards and with the look, see, cover, write, check strategy. Play beat the clock by getting them to see how many times they can write the word in a minute. See if they can beat their own record. Make the words out of playdough.

11. I'm Thinking of a Word: 
While looking at your word wall, tell them you are thinking of a word that starts with/ends with/has the vowel _ in it/rhymes with etc. Get them to name the word and point to it.

Hope these are useful! Let me know which you like best!

Wednesday 8 January 2014

Consonant Digraphs

A lot of time is spent teaching various blends and digraphs in Senior Infants once they have solidified their knowledge of basic sounds and blending. I like to begin teaching digraphs with the consonant digraphs: 'sh', 'ch', 'th' and 'wh'. I find they pick these up quicker than others, as they can name words that start with these sounds quite easily. The sounds are often more useful to them in their reading too. Also, while I find they often confuse vowel digraphs with each other, they rarely have this problem with consonant digraphs.

As I have made and found so many resources connected with these sounds, throughout my time teaching in infants and in learning support, I have compiled a list of the various activities I used with the children. Keep in mind that I did not use every activity for every sound and some were only used when all 4 sounds were covered. The activities can be combined to form a lesson or alternatively some could be used in literacy centers!

1. Jolly Phonics:
As in most schools, I used the Jolly Phonics programme to teach the sounds sh, ch and th initially. You can find the video here. I played the video on many occasions for the children while they ate their lunch. I found playing these songs and other vocabulary building songs and stories (e.g. The British Council LearnEnglishKids website) to them, calmed them down before they went outside and it also meant they were learning at a time which can sometimes be wasted learning time. Surprisingly, they did not seem to mind the repetition!

2. Other songs:
 I also used this video to show them the various words that can be made using the sounds.
I made up the following posters using screen shots from this video:


3. Trace the snake:
I put the following pictures up on the IWB and got them to only shout out the sound if we landed on the particular one we were learning, while tracing the snake pattern in the air. I varied the speeds so that it was more exciting. These are edited resources of something I found online.


  4. PowerPoint:
You can download the PowerPoints I made and used by clicking on each digraph: th sh wh ch.

5. Worksheets:
I have downloaded, created and used various worksheets where the children must either circle/cut out/colour/sort the wh, sh, th or ch words.

6. Pictures of words:
I had the children draw pictures of a word containing the sound and their pictures were put up on the wall around the sound being covered that fortnight.

7. Sorting bowls:
I had 4 colourful party bowls in the middle of the table, each labelled with a sound (sh, th, ch, wh or any other sounds you want to include). They had to sort their selection of picture cards into the bowls in the center of the table according to the sound each began with.

8. Board game:
In groups they played a board game where if they landed on a consonant digraph they had to name a word that started (or ended) with the sound. They then could roll again and take another go.

9. Bingo: 
You can download several bingo cards I made up to test the children's recognition of the sounds here. You can also play the game with words in the boxes as opposed to just the sounds.

10. Storytime:
I read the children a story containing words starting with the sound in question and they had to put their hands on their heads when they heard a word containing the sound. Prim-ed do a series of poems featuring these sounds such as Theodore Thatcher and Walter the Whale. Oxford Reading Tree and similar companies also sell books which are quite simple and dedicate each book to a particular digraph. This is also a great opportunity to use a Big Book too!


I hope some of these ideas get your creative juices flowing! Let me know if you have any other ideas for the teaching of these sounds!


Monday 16 December 2013

Christmas Last Minute Art Ideas

If you are in need of some last minute inspiration for crafts the children can make during the somewhat easy going, final week of school before the holidays, here are some I have used in the past!

1. Sock Snowmen: I have explained how these are made in my Winter post, but I just love them so much, they are getting included again! They are really easy to make and the children love them because they are like teddy bears! This is a craft that can be adapted for any age level too.
2. Reindeer Christmas Cards: I have also made these cards with my students and they were very effective, but super simple! I have no sample of my own but here is one I found at: http://madeinthedessert.wordpress.com/2012/12/10/handmade-childrens-christmas-cards/ 
3. Christmas Brown Paper Stockings: I also have made Christmas stockings with the kids, which do require a lot of preparation (hole punching and gluing the sock together before you get the children to sew the edges together), but they look great when finished and decorated! They also were useful for putting some chocolate Santa lollies in for each child on the last day of school, as a Christmas surprise. I got the idea from Enchanted Learning.


4. 3D stars and angels to hang from the ceiling: 

5. Christmas Wreaths: I have tried these out with Senior classes before, however I think they would possibly work well with Senior Infants also: 
This particular example is from http://rockmybabynewzealand.com/tag/arts/

6. Gingerbread Houses: This is not one for the faint hearted and that is why I saved it until last! It will probably be more useful as an activity if you have more time on your hands than a week. The children brought in shoe boxes, painted them brown and then we finger painted 'smarties' on the walls and roof. We cut out sweets that they made and stuck them onto the house and then added cotton wool to the roof, along with a chimney. The most difficult aspect of this project was attaching the roof the the house, it took up a lot of teacher's time unfortunately! It's one of those painstaking projects which you feel very proud to have accomplished and vow never to do again, all at the same time! 

Merry Christmas everyone!

Monday 2 December 2013

Winter

Winter has well and truly arrived (Met Éireann says it is safe to say so at last!) so here are some lessons for the winter season!

Geography/Science:
We looked at an image and discussed how they knew it is winter in the picture. We then played a game of Cluiche Kim using the following PowerPoint:
In their workbooks, they crossed out the things that you would not see in winter and circled the things you would see. Early finishers had to draw more things you might see in winter. Over the course of the week, the children were asked to bring in new things for our winter nature table from home.

Science:
We discussed the ways that birds keep warm in winter and looked at pictures of birds using feathers for insulation (after feathers were mentioned as one particular way to keep warm).
We explored how birds also use migration to keep warm, through this PhotoStory about Wally the Swallow, which I questioned them on afterwards:

 
The children then drew two pictures side by side of the two ways that birds keep warm in winter.

Geography:
We helped teddy get dressed for the winter weather using items from the magic bag and explained why he would wear these things. We then discussed how teddy would keep warm if he lost his warm winter clothes (e.g. food, heating, exercise). The children mimed different things you could do to keep warm and the class guessed what they were miming. We drew all of the 4 things that would keep teddy warm in winter in separate boxes on our sheets.

History:
We read and discussed the book: ‘Snow Bears’. After this, we sequenced events from the story on the IWB, discussing the vocabulary of: beginning, middle, end, first, second, third, last. The children also drew their own storyboard for the story.
                                     Snow bears sequencing activity from SeniorInfants
We also discussed winter in the past. We talked about ways that people lit and heated their homes in winter in the past and also how they heated their food during the winter. We looked at laminated pictures and sorted the old pictures from the new pictures. We then completed this worksheet, labeling each as either old or new:
Art: 
We filled a white sock with a large ball of newspaper and then a small one. We twisted the top of the sock around a good few times and folded it down on top of the snowman’s head to make a hat for him. We added buttons, eyes, a nose and some children added cardboard (cereal box strength) arms to his sides.
 
Music
I showed the children two winter themed pictures of an inside and outside scene. We talked about sounds you might hear in each scene. I played Vivaldi’s ‘Four Seasons: Winter’ for them and asked them to choose which winter scene they hear in each section of the music i.e. the blizzard picture or the indoor picture by the fire. Following this, they pretended their fingers were falling snow and moved them in time with the music as they listened again. 
We also sang the song ‘Winter Clothes’ as a transitional activity.

Thursday 14 November 2013

Parent Teacher Meetings

I'm in the middle of planning my Parent Teacher Meetings at the moment and thought I might share some of the things I like to prepare ahead of time, to make sure things go as smoothly as possible.

First of all, I fill in a template for each child. Here is a section of the template.
You can view, download and edit the full template here: Parent Teacher Meeting template.

Secondly I like to have a few pieces of information on hand also:
  1. Checklists that I have been keeping on words, sounds and spellings.
  2. The children's maths results.
  3. Art the children have completed so far in the year, stuck into a scrapbook.
  4. The children's workbooks/News copy for them to flick through.
  5. Work samples of the child's writing/maths, etc. 

I hope you find this useful! Let me know if there is anything you like to include, which I may have left out!

Tuesday 12 November 2013

Have You Filled a Bucket Today?

I had often heard of the book: How Full is Your Bucket? but had never tried it out as a lesson until now. I've used it recently with my class and not alone is this an excellent book for infants, but I think it could be adapted for any age level.
You begin by either reading the storywatching the video or simply telling an adapted version of the story to a more grown up class level. Use some props to tell the story: a couple of little buckets, some water and a little eggcup for taking water out of one bucket and putting it into other buckets. After reading the story, you can discuss ways that the main character could fill other people's buckets or how others could fill the boy's bucket.
amazon.com
After the book has been discussed, you can get the children to either draw some examples of good deeds they could do to fill their bucket or write about them in a large bucket template. The children can then design and colour their buckets (find the template here), cut them out and glue them together (in an infant class the teacher would do this). You can stick them to a low noticeboard/easel/cupboard, alongside a bucket of little blank paper slips. In infants, the children can draw a picture on the slips of paper of a kind deed that they did that day and drop one into their own bucket and another into the other person's bucket. In older classes, they can write the deed on the slip of paper and put it into the two buckets. They continue to do this until their bucket is full (in one or two weeks). They can then bring home their slips of paper to show their parents and receive a smiley face for a full bucket (10 faces allow them to take a lucky dip prize - see this post).
http://www.lyndhurstschools.net/olc/page.aspx?id=765&s=136
I like how the idea of self esteem is addressed through this story. It emphasises how good deeds don't only improve the other person's self esteem, but also gives the person who does it that 'feel good factor'. Children see a reason to be kind in life. It is not just because someone tells them that it is important but because they realise it will make them feel good about themselves.

Teacher's Pet has lots of free display resources based on the topic if you are creating a display for your classroom. You can check them out here.
Happy bucket filling!

Tuesday 15 October 2013

Halloween's a comin'...

http://goo.gl/AY6J4L
I'm in the midst of planning my Halloween art projects at the moment and have come across an amazing blog called 'Artventurous'. It has loads of great art ideas for those moments where the creative juices just aren't flowing!
Check out the blog to see some nice Halloween art lessons, including my personal favourites: In a Dark, Dark Wood and 3D Witch Faces.

http://artventurous.blogspot.ie/2012/10/in-dark-dark-wood.html

If you are looking for more Halloween lesson ideas and have not checked out my post Halloween Havoc!, I'd love you to have a look and let me know how some of them work out for you!

Monday 7 October 2013

Play Areas in Infant Classrooms

While I have posted about literary and maths centers in infants before, I haven't posted about play/oral language centers yet and have had some requests to do so!

As with most infant teachers, I prefer to use a rota with the various groups in my classroom during play. I have a chart up on the door of the classroom with the group names written on it and the activities which are laminated, cut out and have Velcro on the back of them, stuck on beside each named group. I rotate the activities each morning so that the children are playing with something different each day and get a turn at every station.

The activities I include on my chart are listed below along with the clip art I use to represent each on my poster.

1. Lego and Jigsaws:
                                                    
2. Dolls (clothes, cot, bottle, etc) and cars:
 3. Doctor's Kit:

4. Restaurant/kitchen: 
 5. Shop:
 6. Sandpit (Only three children are allowed at this activity at one time so it is usually combined with another activity):

.

Hope you find this post useful for giving you some ideas of what you could include on your play rota. If you have any other great ideas for play areas in the classroom, I'd love to hear them in the comments section below.  

Tuesday 24 September 2013

'Like' or 'Follow' Senior Infant Adventures!

If you have come across my blog recently and think it is worth sharing, I would love it if you could 'Like' it on Facebook by clicking on the image below. It will also give you the opportunity to be the first to see when a new post has been added to Senior Infant Adventures:


If Facebook is not your style, Senior Infant Adventures also have a Twitter account for keeping followers up to date with the latest posts on the blog!

Never miss a post again!

Wednesday 11 September 2013

Senior Infants' Timetable

As we settle back into school and begin to get our Learning Support, Resource and P.E. time slots, most of us (well me anyway!) are probably in the midst of deciding upon a more permanent timetable for the year ahead. I have had several requests to show you a sample timetable that I found worked for me. Hopefully this will be particularly useful to those of you doing your Probationary year or starting with Infants for the first time!

Don't forget that this is only a rough guide - every class is different and what works for one teacher may not suit another. It is also important to remember that timetables are always changing throughout the year and as you learn more about your class you may revise it a few times during the year (I would consider possibly moving maths to the morning slot for some classes for example).


You can download the timetable here if you would like to edit it.

Hope this helps some of you!

Tuesday 3 September 2013

Even Teachers Need Their Space!

As I jump in, head first, into a new school year, the one thing I have decided to be is... MORE ORGANISED! (Sound familiar??) As a result, I spent quite some time planning how I was going to organise my classroom this year, with the motto: "A place for everything and everything in its place" driving my quest for a less stressful, more organised environment for myself and the children. 
Not only have I labelled every cupboard and storage spot in the room, but I have spent a lot of time rethinking my filing systems and teacher 'things'.
Hopefully you will find the following ideas useful as you are in the midst of organising your own classroom and hey, if nothing else, I always enjoy getting a peak at people's rooms and desk space (probably the artist in me!) so maybe you are the same!

First on the list is my teacher's desk:


I love being able to see everything I have for easy access, as opposed to having to search through a drawer for a marker, pen etc. I know this may not be to everyone's taste, but it works for me! I still use my drawers for storing blue tack, my whistle, sweets, my stapler, mini post-its for the children and other things that cause a lot of clutter.

As far as plans and records go, I only keep two notebooks on my table. I have an A5 one for my daily lesson notes, as I find I can bring it around in my handbag and bring it home easily in the evening. It also doesn't take up a lot of space on my desk, as sometimes my desk can turn into a dumping ground during a particularly busy day! (Often I have to make an effort to tidy up while the children are eating during lunch or I'd never be able to find anything!) I also have an A4 project book for keeping anecdotal records on the kids. I have the divider sections labelled with the children's names: A-C, D-H, etc. in it.

On the right of my desk, I have this new expanding file box:


Inside is labelled with the different subject areas and also has compartments for school notes, notes to parents, staff meeting notes and busy bee worksheet master copies. I like this a lot so far as it means I don't have to go searching through folders whenever I need to put something away, as more often than not, I will just throw the sheet in a drawer if I don't have an easier option.

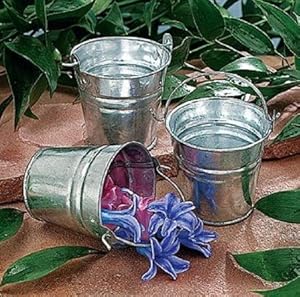
Beside this box, I have all my little buckets. I prefer buckets to those stationary storage containers you can get because, inevitably, I will run out of space for the many items which end up in there. I got the first in Ikea and use it to store all my spare pencils for the kids. (I have seen people paint these buckets if you want to get really creative, but who has the time??!) The rule is: if a pencil is facing nib up, it is pared, and if it is nib down, it is not. I have a child whose job it is before break times, to pare the blunt pencils.


I have another bucket I got as part of a chocolate gift package one Christmas which I use to store scissors, pens, highlighters, markers, tippex, etc, and a plastic cup with a handle for the children's whiteboard markers.

I also have a box of elastic bands, a pencil sharpener, a box of paper clips, post-its and a cute pig timer I picked up in Dealz. I go through little sweet tubs in school so fast and they also make really good storage containers for your desk. I use them to store thumbtacks, staples and the like.


I invested in some paper trays this year also to store my 'corrected' and 'to be corrected' worksheets. Anything to encourage me to correct the work quickly is a good thing!


Never forget about the practical things in a classroom! I have tissues and anti - bacterial hand wipes (these come in more handy than you realise for after-art activities and general hand hygiene for me and the kids!).


Behind my desk I have a bench area and on it I keep this basket for resources. I put in the following day's teacher textbooks and resources in this basket for easy access the next day. It is so much easier to have everything you need in the one place!


My teacher bookshelf is quite far away from my desk which is annoying, but I have labelled the books by subject area so that I can find what I need as quickly as possible!


Now, some people may laugh at this idea, but I hide it under my desk for my own comfort! It's my Teacher's Bin! Again, this is a tub I bought Haribo sweet packets in and I like it as a mini bin because it is quite small but also pretty deep. I am lucky enough to have quite a large classroom, but my numbers are in the 30's and with all the tables, the children are pretty hemmed in! I store the bins at the back of the room because I don't want the children distracted by other children at the bin and to keep bin smells far away from me, but, as a result, it is not easy to get to! I find the teacher bin handy for used post-its, and the other small things that accumulate on the teacher's desk during the day, especially if you are using your desk for reading groups/tin whistle groups etc! 

The final things I have all around my desk are my precious checklists! I have the ones I use everyday stuck to the desk, hidden from view (words/sounds), and other ones like maths test results and P.E. observations stored in a proper assessment folder. I keep things like my classlist, timetable, allergy information and a checklist for incomplete homework in this folder so far also.

Eventually, I will sort out some sort of a substitute pack in case I am ever out, but that may be on my to do list for a while yet!

These are some sorting strategies that I find work for me, but everybody's different! Don't be afraid to share any good organisational ideas you may have in your room in the comments below, as I'm always looking for new ideas!

Until next time!